August 30, 2010

CSA - Week 12


This week I received: eggs (I upgraded to a dozen), banana peppers, jalapeno peppers, hot peppers, kale, tomatoes, grape tomatoes, green pepper, corn, red potatoes, and the best watermelon you ever did eat.

So I really don't have a lot to say this week. I ate most of the produce but didn't prepare anything in a formal recipe. For example, I ate the kale sauteed in my morning eggs, ate the grape tomatoes plain, pickled more banana peppers, and ate the juicy, sweet watermelon by itself.


I decided to do some research on hot peppers since I have quite the collection from the past several weeks, not all pictured here. The best I can tell, these peppers are (left to right): banana peppers, jalapeno peppers, red and green cayenne peppers, and an unknown very hot pepper.   I ordered them from mild to most hot.  I know by taste which ones are the hottest.  I chopped up the cayenne peppers and the hottest pepper and put them in a ziploc bag to freeze.  That way I can easily add them to recipes later.

Funny story: I've read many times about wearing gloves while chopping peppers.  I never really understood why until now.  After I chopped up the peppers and removed the seeds and ribs to freeze them, the burning started.  My hands were on fire for about an hour!  I washed my hands thoroughly several times, but to no avail. 


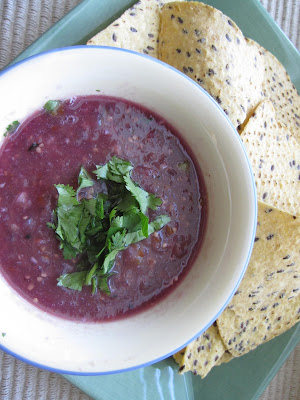
I bought some lovely green and purple tomatillos at the farmer's market to try tomatillo salsa. Since the batch was larger than I could use in one day, I froze half before adding the cilantro and green onions. When I'm ready to use the frozen portion, then I'll add the cilantro and green onions to keep it fresh.

The purple tomatillos gave this salsa the purple hue; more traditional salsa is made with only green tomatillos. This salsa was very good and very sweet.

Roasted Tomatillo Salsa
adapted from Our Best Bites

1 lb. tomatillos, husks removed
3-4 cloves garlic, unpeeled
1 small yellow or white onion, peeled and quartered
1 jalapeno pepper (remove the seeds and membranes for less heat), cut in half lengthwise
1/2 Tbsp. olive oil
3/4 tsp. kosher salt
1/2 tsp. freshly ground black pepper
1/2 c. chopped cilantro
Juice of 1 lime
1/4-1/3 c. chopped green onions

Preheat the oven to 500 degrees. Line a baking sheet with aluminum foil and set aside.

After husking the tomatillos, rinse them well in cool water (they can be sticky). Cut the stems and hard portions (if any) off the tomatillos and cut any very large ones in half.

Combine the tomatillos, unpeeled garlic, onion, and the jalapeno on the lined baking sheet. Drizzle with olive oil and toss the ingredients with your hands to make sure they are all well-coated.

Place the baking sheet in the preheated oven and bake for 15 minutes. If the vegetables have not charred, turn the broiler on to high and cook for 3-5 more minutes or until the skins of the peppers and tomatillos begin to turn black. Remove from the oven and allow to cool.

When the vegetables have cooled, carefully squeeze the skin of the roasted garlic, releasing the soft, roasted garlic clove, into the jar of a blender or workbowl of a food processor. Add the remaining roasted vegetables and then add the salt, pepper, and lime juice. Process until the desired consistency is reached and then transfer to a serving dish. Stir in the chopped cilantro and green onions and serve with chips.

August 29, 2010

Salted Butter Caramel Ice Cream

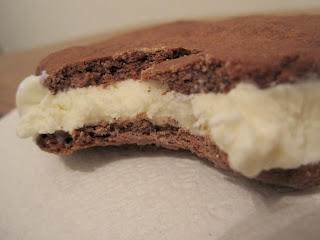
This is by-far some of the best homemade ice cream (and possibly non-homemade) ice cream I've had. It doesn't look like anything too special, but don't let that fool you. This ice cream is just soooo good.  The caramel flavor is amazing.  And the ice cream stayed a little softer in the freezer than other ice creams I've made.

I didn't make the praline candies to mix in just because I got impatient, but I'm sure they'd take this perfect ice cream to perfecto mundo levels.


Salted Butter Caramel Ice Cream
from David Lebovitz

One generous quart

For the caramel praline (mix-in)
½ cup sugar
¾ teaspoon sea salt, such as fleur de sel

For the ice cream custard
2 cups whole milk, divided
1½ cups sugar
4 tablespoons salted butter
scant ½ teaspoon sea salt
1 cup heavy cream
5 large egg yolks
¾ teaspoon vanilla extract

1. To make the caramel praline, spread the ½ cup of sugar in an even layer in a medium-sized, unlined heavy duty saucepan: I use a 6 quart/liter pan. Line a baking sheet with a silicone baking mat or brush it sparingly with unflavored oil.

2. Heat the sugar over moderate heat until the edges begin to melt. Use a heatproof utensil to gently stir the liquefied sugar from the bottom and edges towards the center, stirring, until all the sugar is dissolved. (Or most of it—there may be some lumps, which will melt later.)  Continue to cook stirring infrequently until the caramel starts smoking and begins to smell like it's just about to burn. It won't take long.

3. Without hesitation, sprinkle in the ¾ teaspoon salt without stirring (don't even pause to scratch your nose), then pour the caramel onto the prepared baking sheet and lift up the baking sheet immediately, tilting and swirling it almost vertically to encourage the caramel to form as thin a layer as possible. Set aside to harden and cool.

4. To make the ice cream, make an ice bath by filling a large bowl about a third full with ice cubes and adding a cup or so of water so they're floating. Nest a smaller metal bowl (at least 2 quarts/liters) over the ice, pour 1 cup of the milk into the inner bowl, and rest a mesh strainer on top of it.

5. Spread 1½ cups sugar in the saucepan in an even layer. Cook over moderate heat, until caramelized, using the same method described in Step #2.

6. Once caramelized, remove from heat and stir in the butter and salt, until butter is melted, then gradually whisk in the cream, stirring as you go.

The caramel may harden and seize, but return it to the heat and continue to stir over low heat until any hard caramel is melted. Stir in 1 cup of the milk.

7. Whisk the yolks in a small bowl and gradually pour some of the warm caramel mixture over the yolks, stirring constantly. Scrape the warmed yolks back into the saucepan and cook the custard using a heatproof utensil, stirring constantly (scraping the bottom as you stir) until the mixture thickens. If using an instant-read thermometer, it should read 160-170 F.

8. Pour the custard through the strainer into the milk set over the ice bath, add the vanilla, then stir frequently until the mixture is cooled down. Refrigerate at least 8 hours or until thoroughly chilled.

9. Freeze the mixture in your ice cream maker according to the manufacturer's instructions.

10. While the ice cream is churning, crumble the hardened caramel praline into very little bits, about the size of very large confetti (about ½-inch, or 1 cm). I use a mortar and pestle, although you can make your own kind of music using your hands or a rolling pin.

11. Once your caramel ice cream is churned, quickly stir in the crushed caramel, then chill in the freezer until firm.

Note: As the ice cream sits, the little bits of caramel may liquefy and get runny and gooey, which is what they're intended to do.

August 28, 2010

Peach Jam

So I know I've gone jam crazy this summer (at least crazy for someone who didn't think they liked jam), but I didn't know what I was missing out on! First it was strawberry, then blackberry, now peach. This recipe is so basic: peaches and sugar. It can't be beat.

Here's a before and after picture to illustrate just how much the peaches dissolve and caramelize:
Before
After
I used about 8 medium-sized peaches, and ended up with this one prized jar of jam. I just kind of guessed on how much sugar to use since I had no idea how much my 8 peaches weighed.


The blogger I got this recipe from states that the jam will keep on a shelf for a year. Note this is without boiling the jar through the canning process. I just went ahead and put mine in the fridge. I guess to be safe multiple jars could be canned or frozen.

Peach jam (Marmellata di pesche)
Adapted from Il cucchiaio d‘argento (The silver spoon) via Rachel Eats

Smaller quantity : yield 3 – 4 jars
2 lb 10 oz ripe peaches
2 1/4 cups sugar

Larger quantity : yield 5 – 7 jars
4 1/2 Ib Ripe peaches
3 1/2 cups sugar

Peel the peaches (as you would tomatoes) by putting them in a large bowl and covering them with boiling water. After a minute, using a slotted spoon. scoop the peaches out of the boiling water and lower them into another bowl of cold water. After 30 seconds scoop the peaches out of the cold water and working quickly with your hands or a sharp knife, skin the peaches.

Cut the skinned peaches in half, pull away the stone and then slice each half thinly and place in a large, heavy based saucepan. If the peaches are very ripe and juicy, it is not necessary to add extra water, otherwise add 5 tablespoons. Cook the peaches over a low flame until they start to become mushy, the add the sugar and stir until it has dissolved. Bring the jam to the boil, then reduce the heat and cook the jam over a low flame, stirring occasionally for about 2 1/2 hours. The jam will reduce significantly, darken and caramelize, it should be dense, coating the back of your wooden spoon.

Ladle the jam into warm, clean (sterilized) jars and then seal tightly while they are still hot, label once they are cool and store in a cool dry place.

August 27, 2010

Muffuletta

A few years ago I was searching the recipe index on the Whole Foods website, and came across this sandwich recipe. I had never heard of anything like it, but it sounded good. All I can say is WOW! It rocks.

I assumed it was Italian in origin, but apparently it first made it's appearance in an Italian grocery in New Orleans.

I don't think I've ever had all the ingredients for the olive salad when I've made this, but it still works. The olives, parsley, garlic, and olive oil are the most key components. I've also used a variety of deli meats in place of the ones listed here - try salami, ham, and bologna as more-common substitutes.

Lastly, good bread is vital. You can make your own using the easy baguette recipe and shaping it into a ball for a round loaf.  Bake at 350 for 25 minutes.  I sliced off the top of the bread because it formed a huge peak which would have made this already-huge sandwich very hard to fit into my mouth.


Muffuletta
from Whole Foods

Serves 6
Let this sandwich sit for several hours for the flavors to meld and the oil to impart the bread with a delicious flavor.

Olive Salad
1 1/2 cups chopped pimiento-stuffed green olives
1 cup chopped black olives
2/3 cup extra virgin olive oil
1 tablespoon prepared horseradish
5 tablespoons chopped parsley
1/2 cup chopped pimiento peppers
2 anchovy fillets, mashed (optional)
1 tablespoon finely chopped garlic
1 teaspoon dried oregano
2 teaspoons lemon juice
Black pepper

Sandwich
1 (8- to 10-inch) round loaf crusty Italian bread or large baguette
Shredded lettuce (optional)
Thinly sliced tomatoes (optional)
1/4 pound thinly sliced mortadella or bologna
1/4 pound thinly sliced smoked provolone or fresh mozzarella
1/4 pound thinly sliced ham
1/4 pound thinly sliced sopprasetta or salami

Mix olives, oil, horseradish, parsley, pimiento peppers, anchovies, garlic, oregano, lemon juice and pepper in a glass or ceramic bowl to make an olive spread. Cover and refrigerate for 8 hours, or overnight.

Cut bread in half horizontally and pull out some of the soft interior. Drain olive spread and reserve the liquid. Brush both sides of the bread generously with the reserved liquid, then place half of the olive spread in the hollow of one piece of the bread. Arrange a layer of lettuce and tomatoes on top, then continue with a layer of mortadella, provolone, ham and sopprasetta, alternating ingredients until you have used them all. Finally, top with remaining olive salad and cover with the other half of the bread.

Wrap the loaf tightly in plastic wrap and arrange on a large plate. Cover with a small plate and weigh down with several pounds of canned goods or a cast-iron skillet. Refrigerate for at least 30 minutes, then cut into wedges and serve.

August 26, 2010

Summer Rolls

Summer rolls remind me a lot of sushi - rice-based, fresh, delightful morsels with Asian ingredients. Fresh herbs are a must-have ingredient. These make a light, cold refreshing summer meal, though of course my husband was looking around for the rest of the meal after being served these. So for hearty eaters, this is probably better as a snack or lunch.


Summer Rolls
from Everyday Food

4 ounces vermicelli rice noodles
8 8-inch spring roll wrappers
fillings
peanut dipping sauce

Chicken and Mango Filling
4 oz. chicken cutlets, cooked and shredded
1 medium carrot, cut into matchsticks
1 small ripe mango, peeled and thinly sliced
1/4 cup fresh cilantro leaves

Vegetarian Filling
1 avocado, thinly sliced
1 medium carrot, cut into matchsticks
1 small cucumber, cut into matchsticks
1/2 cup fresh basil leaves

Peanut Dipping Sauce
1/2 cup natural peanut butter
1/2 cup warm water
1/4 cup fresh lime juice, from 2 limes
1 Tbsp. soy sauce
4 tsp. sugar


Pour boiling water over vermicelli rice noodles and soak 15 minutes. Drain and rinse. Divide into 8 equal portions. Fill a wide, shallow bowl with cool water. Working with one spring roll wrapper at a time, soak until pliable, 20 seconds. Transfer to a flat surface and smooth.

Place fillings on bottom third of wrapper, leaving a 1 1/2-inch border. Top with a portion of noodles and another layer of fillings.

Fold bottom of wrapper tightly over fillings.

Roll over once, tuck in sides, and finish rolling. Add fresh herbs and continue rolling to enclose them. Transfer roll to a plate and cover with a slightly damp paper towel. Repeat to make 8 summer rolls. Serve immediately with dipping sauces, or refrigerate, up to 2 hours.

For sauce: whisk together peanut butter and water until smooth. Whisk in lime juice, soy sauce, and sugar.

August 25, 2010

Arancini alla Siciliana

Arancini means orange, as in the fruit. These rice balls are the size of small oranges, hence the name. These were really not too hard to make after I messed up the first two. My mistake was that I didn't pack the balls together enough, so they fell apart while frying. This can be made with risotto instead of plain rice, but plain rice works too. I made mine with plain rice and my only complaint was that the rice base needed more flavor, so I will add more Parmesan next time.

We got some arancini while in Rome. We were near the Piramide and were starving. We stopped in a pizza place (pizza sold by the slice - their version of fast food), ate some pizza, and then got a few arancini to go. Those arancini were made with a tomato-sauced rice with no extra surprise filling. So these can be made several ways - be creative.


Arancini alla Siciliana (Sicilian Croquettes)
from bellalimento

1 1/2 cups long grain rice
4 tablespoons unsalted butter
2 tablespoons Parmigiano Reggiano – grated
3/4 cup ground beef
1/2 onion – minced
1 tablespoon fresh flat leaf Italian parsley – roughly chopped
1/2 cup white wine
2 tablespoons tomato paste
2 ounces fresh mozzarella cheese – cubed
2 large eggs – beaten
1/2 cup all-purpose flour
vegetable/canola oil – enough to fry
salt

1. Bring a large saucepan with plenty of salted water to boil, add rice and cook until tender (approx 15 min). Drain the rice well. Return to saucepan and add 2 tablespoons butter and the Parmigiano. Stir well to combine. Set aside and allow to cool completely. WHILE rice is cooling, into a medium-large saute pan melt the remaining butter over medium heat. Add onion and cook until slightly translucent. Add the beef and cook until brown. Stir as necessary. Add the parsley and season lightly with salt. Add wine and cook until evaporated. Stir in the tomato paste, reduce heat to LOW and cook for additional 10 mins. Check for seasoning, add salt if necessary.

2. Place approx 3-4″ oil into a large dutch oven or similar pan and heat to approx 350 degrees. WHILE oil is heating assemble the Arancini by shaping the cooled rice into balls the size of a SMALL orange (or tangerine). Using your thumb make an indentation allowing you to fill the inside. Place a cube of Mozzarella and top with meat filling. Cover with additional rice and re-shape the ball between your hands, using pressure to compact the rice (you don’t want it to fall apart in the oil). Set aside. Continue until all are assembled.

3. When the oil is ready, place your eggs into a small shallow bowl and the flour into another small shallow bowl. Dip the Arancini into the beaten eggs first (making sure it’s covered on all sides) and then transfer to the flour bowl coating the ball with flour. Tap off any excess flour. Carefully transfer the Arancini into the oil and cook until nice and golden (cooking time will depend on the size of your Arancini), turning it as necessary. Do not crowd the pot, do this in batches if necessary. When golden, transfer to a plate lined with paper towels to sop up any excess oil.

August 23, 2010

Coconut Cupcakes

My friend recently hosted a gathering and put together quite the dessert spread. She made this recipe for coconut cupcakes, which are fabulous - moist and great flavor, to which I credit the almond extract. This friend and I love to get together and bake or we often bake a recipe and then share with each other. So often I feel like I copy her, but as my piano professor said - something like great teachers and cooks are thieves.

I made half the cupcake recipe and only a fourth of the frosting recipe. I always find that cream cheese frosting recipes make way too much for whatever I'm frosting; does anyone else have that problem? And even though I didn't make all the recommended frosting, I still had some leftover!


Coconut Cupcakes
from The Barefoot Contessa Cookbook

Makes 24 cupcakes

3/4 pound (3 sticks) unsalted butter, room temperature
2 cups sugar
5 extra-large eggs at room temperature
1 1/2 teaspoons pure vanilla extract
1 1/2 teaspoons pure almond extract
3 cups flour
1 teaspoon baking powder
1/2 teaspoon baking soda
1/2 teaspoon kosher salt
1 cup buttermilk
14 ounces sweetened, shredded coconut

For the frosting:
1 pound cream cheese at room temperature
3/4 pound (3 sticks) unsalted butter, room temperature
1 teaspoon pure vanilla extract
1/2 teaspoon pure almond extract
1 1/2 pounds confectioners' sugar, sifted

Preheat the oven to 325 degrees F.

In the bowl of an electric mixer fitted with the paddle attachment, cream the butter and sugar on high speed until light and fluffy, about 5 minutes. With the mixer on low speed, add the eggs, 1 at a time, scraping down the bowl after each addition. Add the vanilla and almond extracts and mix well.

In a separate bowl, sift together the flour, baking powder, baking soda, and salt. In 3 parts, alternately add the dry ingredients and the buttermilk to the batter, beginning and ending with the dry. Mix until just combined. Fold in 7 ounces of coconut.

Line a muffin pan with paper liners. Fill each liner to the top with batter. Bake for 25 to 35 minutes, until the tops are brown and a toothpick comes out clean. Allow to cool in the pan for 15 minutes. Remove to a baking rack and cool completely.

Meanwhile, make the frosting. In the bowl of an electric mixer fitted with the paddle attachment, on low speed, cream together the cream cheese, butter, and vanilla and almond extracts. Add the confectioners' sugar and mix until smooth.

Frost the cupcakes and sprinkle with the remaining coconut.

August 21, 2010

CSA - Week 11


Watermelon, corn, zucchini, cucumber, tomatoes, green pepper, red potatoes, hot peppers, and eggs comprised the week's CSA roundup.

I stuck these muffins in the freezer to pull out as needed. I imagine they'll be a great breakfast companion to eggs.


Savory Zucchini Corn Muffins
from mykitchenaddiction.com

1 cup white whole wheat flour
1 cup corn meal
3 teaspoons baking powder
1/2 teaspoon salt
3/4 cup buttermilk
2 eggs
1/4 cup canola oil
1/2 cup shredded zucchini
3/4 cup corn kernels (steamed and cut off of the cob)
Preheat the oven to 400°F. Line a muffin tin (regular sized, 12 muffins) with paper cups or lightly grease and set aside.

In a large mixing bowl, whisk together the white whole wheat flour, corn meal, baking powder, and salt. In a separate bowl, whisk together the buttermilk, eggs, and oil. Add the wet ingredients to the dry ingredients and gently stir just until the dry ingredients are moistened (be careful not to over mix). Fold in the zucchini and corn.

Spoon the mixture into the prepared muffin tin. Bake for 15 minutes, until a toothpick inserted comes out clean. Cool the muffins in the pan for about 10 minutes, then transfer to a wire rack to cool completely.


If you haven't read French Women Don't Get Fat by Mireille Guiliano, I highly recommend it. The author really opened my eyes to the European culture of fresh, seasonal foods, eating for pleasure, why high quality foods are worth the expense, and walking as the transportation mode of choice. Guiliano describes fruits and vegetables picked from the vine and how delicious they can be with little or no preparation. I remember my mouth watering at her description of a plum (if I remember correctly - it's been a few years since I read it).

When I saw this recipe for a simple tomato salad, I wasn't expecting much. But if the tomatoes are ripe, this is one of my favorite green salads! Actually I need to make this salad dressing for other salads as well - it's very good as well.

The tomatoes in this picture are from my friend's garden. I admire her success - she's a first year gardener.


Tomato Salad With Goat Cheese
adapted from French Women Don't Get Fat by Mireille Guiliano

1 bag mixed leaf salad leaves
4 large tomatoes, sliced
2 Tablespoons of shallots, minced
1 teaspoon Dijon mustard
2 Tablespoons vinegar (balsamic or champagne)
6 Tablespoons cold pressed olive oil
4 oz. goat cheese
salt and pepper
4 Tablespoons parsley or basil, chopped (optional)

Place a layer of salad leaves on each plate and then follow with a layer of sliced tomatoes. Salt the tomatoes generously.

Place the minced shallot, mustard, vinegar and olive oil in a bowl and mix well.

Crumble the goat's cheese over the tomatoes and season generously.

Top with some of the dressing over the salad. Lastly, top the salad with chopped parsley.

August 20, 2010

Chicken Satay with Peanut Sauce

Thinly sliced, marinated, grilled chicken can't be anything but tasty! Pair that with a peanut dipping sauce and this dish is bursting with flavor. This recipe is quick and easy. I also grilled mini bell peppers that were brushed with some of the marinade.


Chicken Satay
adapted from Everyday Food via leberpr.com

2 boneless chicken breasts, about 1 lb. total
2 teaspoons sesame oil
2 teaspoons soy sauce
1 garlic clove minced, or a teaspoon of pre-minced garlic
salt and pepper
1/4 teaspoon red pepper flakes
1 tablespoon chopped cilantro
1/4 cup peanut butter
3 tablespoons rice vinegar

Cut chicken into about 10 strips, and toss with sesame oil, soy sauce, cilantro, garlic, and red pepper flakes in medium bowl. Season with salt and pepper and thread each slice onto a skewer.

Heat grill to high heat and spray with oil, cook chicken for about 1 minute per side.

For sauce blend peanut butter and vinegar, add water if necessary for desired flavor and consistency.

August 19, 2010

Light Brioche Buns (Hamburger Buns)

My quest to serve only homemade bread is one step closer with homemade hamburger buns! I served my husband a hamburger on one of these buns and he had no idea I had made it.

These buns are soft and the very slight flavor (not sweet like store-bought) doesn't detract from whatever you're going to put inside. The recipe yields 8 buns, and so I froze the remaining and just pull them out of the freezer as I need them.


Light Brioche Buns
from New York Times via smittenkitchen.com

3 tablespoons warm milk
2 teaspoons active dry yeast
2½ tablespoons sugar
2 large eggs
3 cups bread flour
1/3 cup all-purpose flour
1½ teaspoons salt
2½ tablespoons unsalted butter, softened.
Sesame seeds


1. In a glass measuring cup, combine 1 cup warm water, the milk, yeast and sugar. Let stand until foamy, about 5 minutes. Meanwhile, beat 1 egg.

2. In a large bowl, whisk flours with salt. Add butter and rub into flour between your fingers, making crumbs. Using a dough scraper, stir in yeast mixture and beaten egg until a dough forms. Scrape dough onto clean, unfloured counter and knead, scooping dough up, slapping it on counter and turning it, until smooth and elastic, 8 to 10 minutes.

3. Shape dough into a ball and return it to bowl. Cover bowl with plastic wrap and let rise in a warm place until doubled in bulk, 1 to 2 hours.

4. Line a baking sheet with parchment paper. Using dough scraper, divide dough into 8 equal parts. Gently roll each into a ball and arrange 2 to 3 inches apart on baking sheet. Cover loosely with a clean kitchen towel and let buns rise in a warm place for 1 to 2 hours.

5. Set a large shallow pan of water on oven floor. Preheat oven to 400 degrees with rack in center. Beat remaining egg with 1 tablespoon water and brush some on top of buns. Sprinkle with sesame seeds. Bake, turning sheet halfway through baking, until tops are golden brown, about 15 minutes. Transfer to a rack to cool completely.

Yield: 8 buns

August 18, 2010

Easy Italian Appetizers

One of the reasons I fell in love with food in Italy is their focus on quality, simple ingredients. I really had my eyes opened to the idea that simple food can still be amazing. These appetizers definitely hinge on the quality of their ingredients. And when the cantaloupe or tomatoes are perfect, these appetizers are very appealing.

In Jim Lahey's My Bread, he chronicles his decades-long process to learn to make bread. His European influence centered on bread in Rome, and his words about the Roman cooking style resonated with me: "Cooking, of course, mattered in Rome, but it was a particular kind of cooking--not fancy, no culinary showing off. It was basic and traditional, the reason that grandmothers in the kitchen are so admired there. You could create real beauty with fresh, simple ingredients and careful preparation."


A common Italian appetizer is the simple pairing of fresh cantaloupe with prosciutto, which is cured thin-sliced pork. It's available in the deli or pre-packaged. The cantaloupe I received in my CSA share was divine - very sweet and fragrant- and so it worked magic in this dish.

Cantaloupe and Prosciutto

cantaloupe, cubed
prosciutto, sliced into smaller pieces (about 2 x 1 inches)
fresh mint leaves (optional)

Gather a piece of prosciutto and place on top of a cube of cantaloupe. Top with a mint leaf and secure with a toothpick.


Tomato-Basil Bruschetta
from Essentials of Classic Italian Cooking by Marcella Hazan

6-8 fresh, ripe plum tomatoes
8 to 12 fresh basil leaves
6 garlic cloves
12 slices good, thick-crusted bread, sliced 1/2 to 3/4 inches thick
extra virgin olive oil
salt
freshly ground black pepper

Wash the tomatoes, split them in half lengthwise, and with the tip of a paring knife pick out all the seeds you can. Dice the tomatoes into 1/2-inch cubes.

Wash the basil leaves, shake them thoroughly dry, and tear them into small pieces.

Preheat broiler.

Mash the garlic cloves with a heavy knife handle, crushing them just enough to split them and to loosen the peel, which you will remove and discard.

Broil the bread to golden brown on both sides.

While bread is still hot, rub one side of each slice with the mashed garlic.

Top bread with diced tomato, sprinkle with basil, add salt and pepper, and lightly drizzle each slice with olive oil. Serve while still warm.

August 17, 2010

Blueberry Muffins

I've made many blueberry muffins over the years, but never found a special recipe. I found this recipe online and decided to give it a whirl. These were really good! I served these at a church youth breakfast and received several compliments, so I guess they'll be my standard blueberry muffin recipe from now on.

Many muffin recipes I've made lately contain either sour cream or yogurt, and I think that's a key to moist, yummy muffins. In a pinch, substituting sour cream for the yogurt or vice versa has worked for me.


Blueberry Lemon Muffins
from bits-of-taste.blogspot.com

Dry ingredients:
2 c. flour
1/2 tsp of salt
1 tbsp baking powder
3/4 c. sugar
4 oz or 1 cup blueberries (rinse and pat dry)

Wet ingredients:
2 eggs
3/4 c. coconut oil, melted
3/4 c. sour cream (or substitute plain yogurt)
1 tsp vanilla extract
2 1/2 tbsp lemon juice (approx. the juice from one lemon)
grated zest of 1 small lemon

Pre-heat the oven to 400°F.

Sift together the flour, salt, baking powder and sugar. Stir in blueberries and mix well.

Whisk together the eggs, oil, sour cream, vanilla extract, lemon juice and zest in a mixing bowl (it will look a bit curdled).

Stir the wet ingredients into the dry ingredients and mix well. Spoon into 12 muffin cups until almost full.

Bake for 15-18 minutes or until golden brown on the top.

Test with a skewer, if the skewer comes out clean, the muffins are done. Remove and cool on a rack.

Best served warm, but the muffins will keep for a day in an airtight container. Or freeze extra muffins.

Makes 12 muffins with medium-sized muffin cups.

August 15, 2010

CSA - Week 10


In CSA Share Week 10 (halfway!) I received kale, corn, tomatoes, banana peppers, serrano peppers, purple potatoes, eggs, cantaloupe, yellow squash, and cucumber.

I made the following recipes:

Cantaloupe and Prosciutto Appetizer - see an upcoming Italian appetizers post for the details
Kale Chips
Corn Fritters
Tasty Frittata


Roasting vegetables with oil always yields yummy results. These kale chips were great, though they're very fragile and almost dissolve in your mouth. This is an easy, no-coaxing-required way to eat a very healthy vegetable.


Kale Chips

1 bunch kale
olive oil
good-quality coarse salt

Preheat the oven to 400°F.

Wash kale and dry it in a salad spinner or between tea towels. (Extra moisture will keep them from getting nice and crispy.) Cut or pull out the tough stems, tear the leaves into chip-sized pieces and spread out on a rimmed baking sheet. Drizzle with oil and toss with your hands to coat well; arrange in a single layer and sprinkle with salt.

Roast for about 10 minutes, until crispy and starting to turn brown on the edges, but not too dark. Serve immediately or cool completely and store in an airtight container until ready to serve.

I don't think I've ever had corn fritters before. They're an easy way to eat more vegetables. They're supposed to be fried, but I used a very shallow layer of oil to cook them instead of immersing them in oil. These fritters are dominated mostly by the corn, even though other flavors are added to the batter. Serve with sour cream.


Corn Fritters
adapted from veggienumnum.com

1 cup flour
1 tsp paprika
1 tsp brown sugar
2 eggs
½ cup milk
3 cobs of corn (3 cups of corn kernels)
1 cup peas
½ red bell pepper, diced
2 green onions, finely diced
1-2 tbsp cilantro or parsley, roughly chopped
1 tsp salt
vegetable oil for frying

Sift the flour into a large bowl, stir in the paprika and sugar and make a well in the center.

Whisk the two eggs with the milk in a separate bowl. Gradually add the egg mixture to the flour stirring until it forms a stiff batter.

Remove the kernels from the corn cobs and in a large bowl combine them with the remaining fresh ingredients.

Gently fold the batter into the corn mixture until well combined.

Heat about 2 tablespoons of oil over a medium heat in a large fry pan.

Drop heaped tablespoons of batter into the hot oil, cook on either side for a few minutes until crisp and golden. Remove from the heat and keep warm while you cook the remainder adding a little more oil when needed.


I love eggs and this frittata is super tasty, but that's to be expected coming from 101cookbooks. I used the purple potatoes in this frittata for a pretty twist.

Toasting the pumpkin seeds (also called pepitas) is a must. To toast the seeds, place in an ungreased skillet on medium-high heat. Stir frequently. The seeds will toast in just a few minutes - they actually pop and puff up slightly and get golden brown.


A Tasty Frittata
from 101cookbooks.com

Cilantro Chile Sauce
2 large cloves garlic
1/2 cup extra virgin olive oil
2 tablespoons lemon juice, freshly squeezed
1 small bunch cilantro
1 green (serrano) chile, seeds removed
2 pinches ground cumin
a couple big pinches of salt

Frittata
6 large organic eggs
1 tablespoon olive oil
1 small yellow onion, chopped
3 small potatoes, very very thinly sliced
1/2 cup yellow zucchini or cauliflower, 1/2-inch pieces
1/4 cup goat cheese, crumbled
1/4 cup pumpkin seeds, toasted
couple pinches of salt

Preheat your oven to 450F degrees. Make the cilantro chile sauce by pureeing the garlic, olive oil, lemon juice, cilantro, chile, cumin, and salt until very smooth. Taste and add more salt if needed. Set aside.

In a medium bowl whisk the eggs with a small pinch of salt. Set aside. In a (small) 8 1/2-inch ovenproof nonstick skillet over medium-high heat add the olive oil, onion, and another pinch of salt. Saute, stirring constantly, until the onion starts to brown, 5 - 7 minutes. Add the potatoes and zucchini (or cauliflower), cover, and cook for another 3 minutes or so. Slide everything out of the skillet onto a plate and set aside.

Turn down the heat a bit. Using the same skillet, add the eggs and cook over medium-low heat for about 5 minutes or until the eggs are just set and there isn't a lot of liquid running around the pan. To facilitate this, run a spatula underneath the sides of the frittata and tilt the pan so the uncooked eggs run to the underside and cook. Drizzle the eggs with a few tablespoons of the cilantro chile sauce, now sprinkle the potato onion mixture over the top.

Place the skillet in the oven and bake for about 9 minutes, or until well set and puffy. Add a crumble of goat cheese and the pumpkin seeds across the top of the frittata in the final 2 minutes of baking. Remove from oven (be careful the handle is hot!), cut into wedges and serve.

Serves 2 to 4.

August 12, 2010

Pork Tacos with Corn Salsa

Earlier this week I told you pizza is a staple on my menu each week. Another staple is some sort of Mexican food that involves a tortilla. While it's easy to throw together some simple tacos or fajitas without a recipe, I enjoy trying recipes for these dishes as well to keep things interesting. I really liked this recipe which uses shredded pork as the main ingredient accompanied with a fresh corn salsa.


Pork Tacos with Corn Salsa
adapted from dinneralovestory.com

2 Tbsp. olive oil
1 1/4 lbs. pork tenderloin
1/2 medium onion, chopped
1 clove garlic, minced
dash red pepper flakes
salt and pepper
15 oz. can diced tomatoes
1 Tbsp. chili powder
1/2 tsp. cumin
1 bay leaf
1/2 tsp. dried oregano
4-6 whole wheat tortillas
shredded Monterey Jack cheese
sour cream

Corn Salsa
2 cobs of corn, kernels removed
1 large tomato, diced
1 small bunch cilantro, chopped
2 scallions, diced
splash of olive oil
lime juice - about half a lime
salt, to taste

In a small Dutch oven or a medium, straight-sided pot, heat 2 tablespoons olive oil over medium-high heat. Add a salted-and-peppered pork tenderloin (about 1 1/4 pounds; the standard size) and brown on all sides. (It does not have to cook through.) Once it’s browned, remove from heat and to the same pot, add onion, garlic, a dash of red pepper flakes, salt and pepper. Cook until onions are soft, about 3 minutes. Add one can diced tomatoes, chili powder, cumin, bay leaf, and a few hefty shakes of dried oregano. Stir to combine, then add pork tenderloin back to pot, nestling it in the liquid. Bring to a boil, then cover pot and simmer for about 30 minutes.

While pork simmers away, make a corn salad with kernels, chopped tomatoes, cilantro, scallions, olive oil, a squeeze of lime, and salt. Adjust the lime and salt to taste. Warm 4-6 whole wheat tortillas (wrapped in foil) in a 350°F oven.

When pork has cooked, remove from pot and, using two forks, shred it into pieces as shown above. Add shreds back to the sauce, stir everything together, then assemble tacos - top a tortilla with pork, corn salsa, shredded Monterey Jack cheese and sour cream.

August 11, 2010

Best Chocolate Brownies Ever

Ready for the richest, darkest, fudgiest brownies you will ever swoon over? These are not for the faint of heart. Mom, you'll loooove these and Dad will hate them, so invite someone over to help you devour them.


Rick Katz's Brownies for Julia
from Baking: From my Home to Yours by Dorie Greenspan

1 cup all-purpose flour
1 teaspoon salt
2 sticks (8 ounces) unsalted butter, cut into 16 pieces
4 ounces unsweetened chocolate, coarsely chopped
2 ounces bittersweet chocolate, coarsely chopped
2 cups sugar
1 teaspoon pure vanilla extract
4 large eggs

Center a rack in the oven and preheat the oven to 350 degrees F.  Put a 9-inch square baking pan on a baking sheet.

Whisk the flour and salt together.

Set a heatproof bowl over a saucepan of gently simmering water, put the butter in the bowl and top with the chopped chocolate.  Stir frequently until the ingredients are just melted--you don't want them to get so hot that the butter separates.  Add 1 cup of the sugar and whisk gently just to incorporate it, then remove the bowl from the pan of water.  Stir in the vanilla and transfer the warm chocolate to a large bowl.

Put the remaining 1 cup sugar into the bowl of a stand mixer or a medium bowl and, using a whisk, stir in the eggs.  Switch to a rubber spatula and, little by little, add half of the sugar-egg mixture to the warm chocolate, stirring very gently but without stopping--you don't want the heat of the chocolate to cook the eggs.

With the whisk attachment or with a hand mixer, beat the remaining sugar and eggs on medium-high speed for about 3 minutes, or until they double in volume.  Using the spatula and a light touch, fold the whipped eggs into the chocolate mixture, stopping just short of blending them in completely.  Sprinkle the dry ingredients over the batter and delicately fold them in, working only until the disappear.  Scrape the batter into the pan and smooth the top with the spatula.

Bake for 25 to 28 minutes, or until the top looks dry.  Poke a thin knife in to the center and take a peek: the brownies should be only just set and still pretty gooey.  Transfer the pan to a rack and cool to room temperature.  The brownies are fragile and best cut in the pan.  Cut eighteen 1/1/2 x 3 inch bars.

August 9, 2010

Sausage and Olive Pizza

Pizza is a staple on my menu. It's very easy to prepare dough and freeze some for later. When I'm ready to bake the frozen dough, I allow it to de-frost in the fridge overnight. Then I remove from the fridge and allow to sit at room temperature for a half hour or so to make for easier dough handling.

I loved this combination of ingredients -- the fresh rosemary is the key ingredient.


Sausage and Olive Pizza
adapted from Everyday Food

8 oz. shredded mozzarella cheese
1/2 lb. ground Italian sausage, sauteed in pan until cooked
1/4 c. sliced green olives
1/4 c. sliced black olives (kalamata olives work too)
thinly sliced red onion
chopped fresh rosemary leaves
olive oil
pizza crust - see this link if you need a recipe

Preheat oven to 500. If using pizza stone, preheat stone for about 20 minutes. Prepare pizza crust, roll out. Brush crust with olive oil. Top with mozzarella cheese, sausage, olives, red onion, and rosemary leaves. Transfer pizza to pre-heated stone placed on a lower rack in the oven. Bake for 8-10 minutes or until crust is light brown and cheese is bubbly.

I prefer to roll out my pizza on parchment paper. Once rolled out, transfer the dough on the paper to an overturned cookie sheet. Add the toppings and then carefully slide the prepared pizza from cookie sheet to the preheated stone (keep the paper underneath the dough during baking). Once finished baking, remove stone from oven and carefully pull paper with pizza to another surface like a counter or cooling rack to prevent further baking on the hot stone.

August 7, 2010

Peach Ice Cream

When I first made this ice cream, I wasn't that impressed. At the time of making it, I had many exciting flavors of ice cream to choose from in my freezer.** After the other flavors were gone, I was left with peach ice cream. And it tasted good. It's a lighter, less dense, fresh tasting ice cream. And while I love sugar, lately I've been impressed with treats that aren't too sweet. To me, this ice cream was that - sweet enough, but not like candy.

**My good friend bought a package of pint-sized containers for ice cream, like the one below. She made several batches of ice cream and shared them with me. She also gave me some containers which I filled with ice cream as well. Her flavors (some of which I will make myself and share the recipes): rich chocolate, salted butter caramel, cinnamon with cookie dough, and vanilla with peanut butter cups.


Peach Ice Cream
from The Perfect Scoop by David Lebovitz

1 1/3 pounds ripe peaches (about 4 large peaches)
1/2 cup water
3/4 cup sugar
1/2 cup sour cream
1 cup heavy cream
1/4 tsp. vanilla extract
a few drops freshly squeezed lemon juice

Peel the peaches, slice them in half, and remove the pits. Cut the peaches into chunks and cook them with the water in a medium, nonreactive saucepan over medium heat, covered, stirring once or twice, until soft and cooked through, about 10 minutes.

Remove from the heat, stir in the sugar, then cool to room temperature.

Puree the cooked peaches and any liquid in a blender or food processor with the sour cream, heavy cream, vanilla, and lemon juice until almost smooth but slightly chunky.

Chill the mixture thoroughly in the refrigerator, then freeze it in your ice cream maker according to the manufacturer's instructions.

August 6, 2010

CSA - Week 9

The last few years I've learned and changed a lot about my approach to food. Eating food in season is best - for your health, your pocketbook, and the community. This week I had Insalata Caprese for lunch several times. This salad only works with fresh, ripe ingredients. Since tomatoes are at their peak now, this is really the only time to eat this salad all year. It's the same with the corn - fresh, raw corn is really only to be enjoyed during the summer. The Quinoa Summer Salad hinges on the sweetness of the corn.

To extend the best of summer produce, I've utilized several preserving techniques this week: pickling, freezing, and jamming (is that a verb?). I made pickled banana peppers, froze corn (cook whole cob in boiling water for 3 minutes. when cool, cut corn from cob and freeze), and made blackberry freezer jam. What I really need is to learn how and obtain the proper tools for canning. I'm sure I will sometime soon.


CSA Week 9 yielded corn, orange tomato, cherry tomatoes, green pepper, cucumber, carrot, red potatoes, hot red pepper, banana peppers, blackberries, and eggs.

Here are the recipes:
Insalata Caprese
Blackberry Jam
Pickled Banana Peppers
Quinoa Summer Salad


Insalata Caprese

sliced ripe tomatoes
fresh mozzarella cheese
drizzle of olive oil
torn fresh basil
salt and pepper

Arrange the tomatoes and cheese artfully on a plate.  Sprinkle with torn basil, salt and pepper, and drizzle with olive oil.


This quinoa salad totally worked because of the corn. The corn's sweetness balanced out the veggies and the slight bitterness of the quinoa. If you haven't tried quinoa, I highly recommend it. It's so easy to prepare, is super healthy, and can be used where you might use pasta or grains.


Quinoa Summer Salad
from operagirlcooks.com

2 C. water
1 1/2 C. quinoa
kernels from 3 ears of white corn
1 large (1/2 lb) zucchini, diced
1/2 lb. mini sweet peppers (or one large orange bell pepper), diced
1 pint grape tomatoes, quartered
3 large jalapenos, veins and seeds removed, diced small
1 c. cilantro leaves, chopped
juice of 1 lemon
3 Tbsp. extra virgin olive oil
1 tsp. ground black pepper
1/2 tsp. kosher salt

In a small (2 quart) saucepan, bring the water to a boil. Add the quinoa and bring back up to a simmer. Turn heat down to lowest setting, cover, and let simmer for 15 minutes. Turn off heat and let stand, covered, for another 10 minutes.

In a large bowl, combine the warm quinoa with the rest of the ingredients. Stir until evenly mixed.


I followed these directions for the pickled peppers except that I didn't boil the filled jars. Instead, after filling the jars with the peppers and brine, I put the jars in the fridge.


Pickled Banana Peppers
from jessicasfoodspot.blogspot.com

10-12 banana peppers
1 hot pepper
1 cup white vinegar
1 cup water
1/2 tsp salt
1/2 tsp dry mustard seed
1 tsp pepper corns
2 cloves garlic, peeled

The first thing you need to do is sterilize your jar. A hot water dishwashing cycle should work with a hot dry cycle. After removing from the dishwasher be sure to thoroughly dry the jar, lid and ring.

In a saucepan bring the vinegar, water, salt, peppercorns and mustard seed to a boil. Then remove from heat. In a large stock pot bring plain water to a boil.

While the brine is coming to a boil, slice the peppers into rings. Cut one of the garlic cloves into fourths and layer the peppers and garlic in a jar. Put the second garlic clove on top of the peppers.

Pour the brine over the peppers, leaving 1/2 inch space at the top of the jar. Place the lid on top of the jar making sure that seal is tight, then screw on the ring. Place the jar in the large stock pot of boiling water and boil for 10 minutes. Carefully remove the hot jar from the boiling water. After cooling for a few minutes check to make sure the jar sealed (If it is not sealed the middle of the lid will pop up and down). If it didn't seal just be sure to always keep it refrigerated. If it did seal you can keep in the pantry until the seal is broken.

August 5, 2010

Blackberry Jam

I bought some canning jars the other day because I thought they would be useful storage containers. I'm now one step closer to actually canning food. I thought about taking the plunge, but I don't have a pot large enough to boil the jars. Someday...

I don't know how much longer I'll be receiving blackberries in my CSA share, so I thought I'd make them last longer by preserving them in jam form. I haven't actually eaten the jam yet, as I put it in my freezer. My fridge already has a container of strawberry jam, so I'll have to wait until that's gone to take out the blackberry jam.


Blackberry Jam
adapted from several web sources

4 cups crushed blackberries
3 1/2 cups sugar
1 Tbsp. lemon juice

To prepare fruit: Sort and wash the blackberries. Crush the berries with a potato masher or back of a spoon.
To make jam: Measure crushed blackberries into a kettle. Add sugar and stir well. Boil rapidly, stirring constantly, until the mixture reaches 220° – 222° F or thickens. Remove from heat.

Pour into prepared jam containers. I put these jars of jam in the freezer, but sealing the jars through the canning process works as well.

Baby Back Pork Ribs - no grill required

I've made ribs a handful of times, each time trying a new recipe. There are so many different methods to cooking them - grill, boil, slow roast, crockpot - and many different ways to flavor them - dry rub, cook in sauce, add sauce at the end.

I searched for some tasty looking recipes from fellow food blogs and pulled together three different recipes. These ribs turned out fabulous. Ribs are one of my husband's favorite items to order when eating out, and he highly approved of these. Success!

The two most important characteristics for good ribs are tenderness and flavor. These ribs were super tender due to the cooking in the crockpot. The BBQ sauce provided the taste.


Baby Back Pork Ribs

One full slab baby back pork ribs

Dry Rub
1/2 cup packed light brown sugar
6 TB smoked paprika
2 TB chili powder
4 tsp granulated garlic
4 tsp granulated onion
4 tsp dry mustard
2 tsp kosher salt
2 tsp ground black pepper

In a small bowl mix all the spices together. This makes over a cup of rub, so you can use some now and save some for later. Store the rub in an airtight container, such as a jar or resealable bag.

BBQ sauce
1 cup ketchup
1/4 cup molasses
1/8 cup dijon mustard
2-3 tbs hot sauce
1 tbs worcestershire sauce
1/2 onion
2 cloves garlic
1 tbs butter
1 tbs cider vinegar
dash of liquid smoke

Rub ribs with dry rub and let sit overnight in the refrigerator.

CROCKPOT: Cook in the crockpot on high for 1 1/2 hours, then turn to low and cook for at least 5 hours.

INSTANT POT: Put trivet in instant pot. Add 1 cup of water and 1/2 cup apple cider vinegar. Arrange ribs standing up around perimeter of pot. Cook on manual for 25 minutes, and then let natural release for 10 minutes.

Near the end of the cooking time, prepare the BBQ sauce. In a stock pot melt butter, add garlic and onion and cook until onions are translucent. add all other ingredients into pot, and bring to a boil. lower heat and cook 10 minutes to combine flavors, stirring every minute or so. With an immersion blender, blend all ingredients until smooth.

After the ribs are finished cooking in the crockpot or instant pot, remove from crockpot or instant pot. Brush ribs with BBQ sauce and broil in oven for just a few minutes until sauce is baked on.

August 4, 2010

Chocolate Cookies with White Chocolate Chips

These cookies are fudgy and divine. Make them soon. Or don't, because you won't be able to stop eating them.


Chocolate Cookies with White Chips
I've forgotten my source

2 1/4 c. flour
3/4 c. sugar
2/3 c. cocoa
2/3 c. brown sugar
1 tsp. soda
1 tsp. vanilla
1/4 tsp. salt
2 eggs
1 c. butter, softened
2 c. white choc. chips

Heat oven to 350˚. Mix flour, cocoa, salt, soda, and salt in small bowl. In large bowl, mix butter, both sugars, and vanilla. Beat in eggs. Gradually add flour mixture. Stir in chips. Drop by tablespoonful on baking sheet. Bake for 9-11 minutes.

August 3, 2010

Chicken Salad Sandwiches


My mom discovered this chicken salad sandwich at a local deli/sandwich shop. She was able to find out the secret key ingredient: Honeycup Uniquely Sharp Mustard. It's basically honey mustard with a good kick. The first ingredient listed is brown sugar. This mustard is available in local grocery stores, but I'm not sure in what other cities it's sold. I found it sold online here.

Because the mustard is so yummy, I don't do anything special to the actual chicken salad. I boil the chicken, shred it, add mayonnaise, salt and pepper, and chopped dill pickles. So if you don't have a splendid mustard to serve it with, you probably should look elsewhere for a tastier chicken salad recipe.

For the sandwich, use salted rye bread or a croissant. Generously spread on the Honeycup Mustard (really, the more the better. See it oozing out from under the tomato in the photo?). Add a slice of swiss cheese, a dollop of chicken salad, sliced tomato, thinly sliced red onion, and a piece of lettuce.

August 2, 2010

Ice Cream Sandwiches

Who needs those soggy store bought ice cream sandwich cookies?

The cookies baked up a little crunchy, but they softened after being in the freezer next to the ice cream. The cookies were pretty sturdy and worked well for making sandwiches.

I used plain homemade vanilla ice cream, but next time I'll try a different flavor, or vanilla with something stirred in.


Chocolate Ice Cream Sandwich Cookies
from The Perfect Scoop by David Lebovitz

1/2 cup unsalted butter, at room temperature
1 cup sugar
1 large egg, at room temperature
1 tsp. vanilla
6 Tbsp. unsweetened Dutch-process cocoa powder
1 1/2 cups flour
1 tsp. baking powder
1/8 tsp. salt

Preheat the oven to 350. Line 2 baking sheets with parchment paper or silicone baking mats.

Beat together the butter and sugar in the bowl of an electric stand mixer, or by hand, until smooth. Beat in the egg and vanilla.

In a separate bowl, whisk together the cocoa, flour, baking powder, and salt. Stir the dry ingredients gradually into the creamed butter mixture until completely incorporated and there are no streaks of butter.

Form the dough into sixteen 1 1/2-inch rounds. On the baking sheets, flatten the rounds so they're 3 inches across, spacing them evenly. You can get 8 on a normal 11 by 17-inch baking sheet, with 3 going lengthwise down the sides and 2 in the center in between.

Bake for 20 minutes, rotating the baking sheets midway during baking, then remove from the oven.

Once cool, sandwich ice cream between 2 cookies, then wrap each ice cream sandwich in plastic wrap and store in the freezer.

CSA - Week 8


Here we go again.  This week I received corn, yellow squash, green pepper, green and yellow beans, potatoes, banana peppers, an unidentified hot pepper, a carrot, tomato, eggs and blackberries.


This super simple recipe from the super simple Mark Bittman is super tasty.

Mexican Street Corn
from Mark Bittman

Mix together mayonnaise, freshly squeezed lime juice, chili powder, salt and pepper. Spread on husked fresh corn and grill.


I know I posted a cobbler recipe recently, but that one is tried and true for peaches. In this cobbler, the lemon juice and cinnamon complimented the blackberries so well that I thought it was worth posting.

Blackberry Cobbler
from thehungrytxn.blogspot.com

for the filling:
3 1/2 c blackberries
1/2 c sugar
2 tbsp. cornstarch
1 tsp. lemon juice
1/4 tsp. cinnamon

for the topping:
1 c flour
1/2 c sugar
1 tsp. baking powder
1/2 tsp. salt
6 tbsp. cold butter
1/4 c boiling water

Combine the filling ingredients, cook over medium heat until sauce starts to thicken, about 5-10 minutes. Remove from heat.

To make the biscuit topping, combine dry ingredients. Mix thoroughly. Cut in cold butter until mixture resembles rice. Add boiling water and stir to combine. Drop spoonfuls on top of filling.
Bake for 20-25 minutes at 400 degrees until top is golden brown and filling is bubbling.


I found this recipe surfing food blogs and decided to make it since I had all the ingredients. One of my friends is going to tease me because it's yet another French-titled recipe, though I had no idea what it was when I came across it. This dish is actually from Louisiana - good ol' southern cooking with the vegetables cooked in bacon grease. This made a super yummy bowl of vegetables.

Crispy Bacon and Corn Maque Choux
from Emeril Lagasse on foodnetwork.com

1/2 pound bacon, chopped
6 ears young sweet corn
2 tablespoons vegetable oil
1 1/2 cups chopped onions
1 cup chopped green bell peppers
Salt
Cayenne pepper
2 cups chopped, peeled, and seeded tomatoes, or 1 cup chopped canned tomatoes
1 cup milk
1/4 cup chopped green onions

In a large skillet, over medium heat, render the bacon until crispy. Drain the bacon on paper towels and set aside. Pour off all of the bacon fat except for 2 tablespoons. Cut the corn off the cob by thinly slicing across the tops of the kernels and then cutting across a second time to release the milk from the corn. Scrape the cob once or twice to extract the milk. You should have about 4 cups of corn with the milk. To the pan, over medium heat, add the oil, onions and bell peppers. Season with salt and cayenne. Saute for 2 minutes. Add the corn. Season with salt and cayenne. Continue to saute for 10 minutes. Add the tomatoes and cook, stirring occasionally, for 15 minutes, or until the corn is tender. Stir in the milk and remove from heat. Stir in the crispy bacon and green onions. Serve immediately.

August 1, 2010

Peppermint Patties

Who knew making homemade peppermint patties is so easy? Well it is! You can do it!

I have made this recipe twice. Once, following the original directions, which makes big slabs which are cut into smaller pieces. Since the recipe is from an ice cream cookbook, the patties aren't pretty because they're supposed to be stirred into ice cream. When I made them I noticed the mint dough was pretty easy to work with and stayed together very well when dipped into chocolate. So the second time I made them, I patted the dough flat and then used a cookie cutter to form small disks. It worked like a mint charm!


Peppermint Patties
from The Perfect Scoop by David Lebovitz

2 cups confectioners' sugar
3 Tbsp. light corn syrup
2 tsp. water
scant 1/8 tsp. peppermint extract or oil
6 ounces bittersweet or semisweet chocolate, chopped

Line a baking sheet with plastic wrap or parchment paper and dust it with about 1 tablespoon of the confectioners' sugar.

In a bowl, mix the corn syrup, water, and mint extract or oil. Gradually stir in the remiaing confectioner's sugar. As the mixture thickens, knead it with your hands until it forms a smooth ball (it will seem dry at first, but it will come together).

Pat the dough out ounto the sugar-dusted baking sheet about 1/3 inch thick and let it dry, uncovered, for at least 8 hours or overnight.

Melt the chocolate in a clean, absolutely dry bowl set over simmering water, stirring until smooth. Remove from the heat. Line a dinner plate with plastic wrap. Cut the mint disk into 6 triangular wedges, as if cutting a pie, and brush off any excess powdered sugar. Using 2 forks, dip each wedge in the chocolate, turning it over to coat both sides, then trasfer each piece to the plastic-lined dinner plate.

Chill in the refrigerator or freezer until the chocolate has firmed up, then chop into bite-sized pieces.